If you are a WordPress Developer and working on client site where you need to create custom post type in WordPress to addons some new feature. But you don’t want to install any WordPress plugin to create custom post type, then you can create manually by adding the required code in your theme’s functions.php file. Let’s first understand the custom post type in WordPress.
What is Custom Post Type in WordPress?
When you install WordPress, By default it comes with following built-in post types:
- Post
- Page
- Attachment
- Revision
- Nav Menu
Post and Page are the most known post type in WordPress. However, today WordPress has become more flexible and advanced. Therefore, You can create your own custom post types and call them whatever you want like Courses, Testimonials, News, Portfolios, Recipe, etc.
Creating a Custom Post Type using Plugin – The Easy Way
The easiest way to creating a custom post type in WordPress is by using a plugin.
Drawback or Problem with plugin
The problem with using a plugin is that when the plugin is deactivated your custom post types will disappear from the Admin Dashboard. Any data you have in those custom post types will still be available, but the custom post type will be unregistered and will not be accessible from the admin panel.
Creating a Custom Post Type Manually
Before start, I want to explain file directory path details, where you need to write custom post type code. So you need to navigate from your WordPress theme directory to functions.php.
Suppose we want to create custom post type for “News”. Now let’s take a look at a short piece of code that adds “News” your custom post type option in the admin panel.
|
2 3 4 5 6 7 8 9 10 11 12 13 14 15 16 17 18 19 20 |
add_action( 'init', 'create_custom_post_type' ); function create_custom_post_type() { $args = array( 'labels' => array( 'name' => __( 'news' ), 'singular_name' => __( 'News' ) ), 'public' => true, 'has_archive' => false, 'rewrite' => array('slug' => 'news'), ); register_post_type( 'news',$args); } // Hooking up our function to theme setup |
To see how it will appear at the end of your WordPress Admin dashboard, see to the image below.
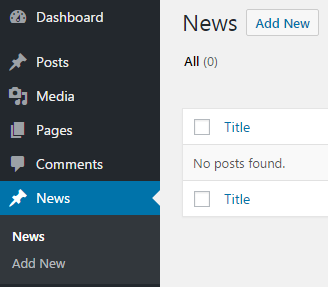
Whenever you want to create custom post types with your WordPress project, it is required to use init for the hook in add_action(). The register_post_type() function takes the arguments.
Now let’s see a detailed piece of code to adds more options with your custom post type.
|
2 3 4 5 6 7 8 9 10 11 12 13 14 15 16 17 18 19 20 21 22 23 24 25 26 27 28 29 30 31 32 33 34 35 36 37 38 39 40 41 42 43 44 45 46 47 48 49 50 51 52 53 54 55 56 57 58 59 |
//Init Hook for the custom post type add_action('init', 'create_custom_post_type'); function create_custom_post_type() { $supports = array( 'title', // post title 'editor', // post content 'author', // post author 'thumbnail', // featured images 'excerpt', // post excerpt 'custom-fields', // custom fields 'comments', // post comments 'revisions', // post revisions 'post-formats', // post formats ); $labels = array( 'name' => _x('news', 'plural'), 'singular_name' => _x('news', 'singular'), 'menu_name' => _x('news', 'admin menu'), 'name_admin_bar' => _x('news', 'admin bar'), 'add_new' => _x('Add New', 'add new'), 'add_new_item' => __('Add New news'), 'new_item' => __('New news'), 'edit_item' => __('Edit news'), 'view_item' => __('View news'), 'all_items' => __('All news'), 'search_items' => __('Search news'), 'not_found' => __('No news found.'), ); $args = array( 'supports' => $supports, 'labels' => $labels, 'description' => 'Holds our News and specific data', 'public' => true, 'taxonomies' => array( 'category', 'post_tag' ), 'show_ui' => true, 'show_in_menu' => true, 'show_in_nav_menus' => true, 'show_in_admin_bar' => true, 'can_export' => true, 'capability_type' => 'post', 'show_in_rest' => true, 'query_var' => true, 'rewrite' => array('slug' => 'news'), 'has_archive' => true, 'hierarchical' => false, 'menu_position' => 6, 'menu_icon' => 'dashicons-megaphone', ); register_post_type('news', $args); // Register Post type } |
$supports: Specifies the post type is compatible and supports all essential features.
$labels: Specifies that the post type is referred properly to the admin area.
$args: Specifies a permalink slug of the news, taxonomy, menu icon, and a menu position.
Now let’s take a look after adding extra features of custom post type in our WordPress Website.
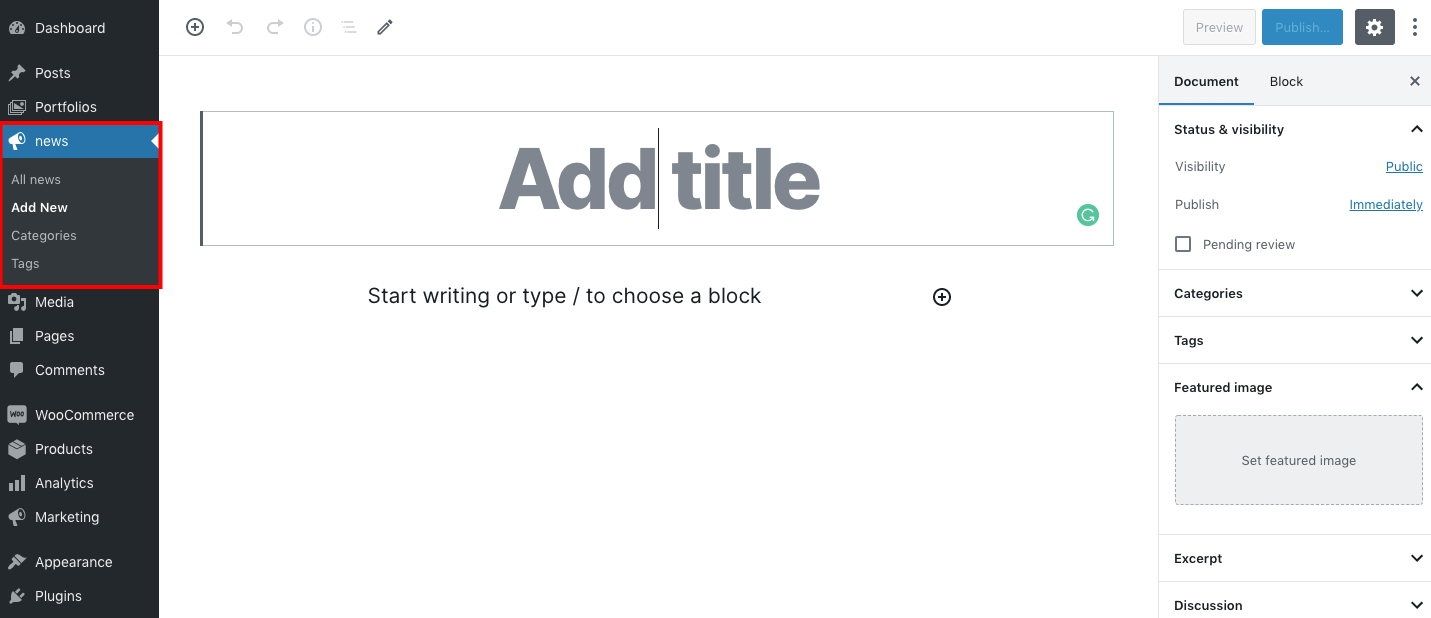
Create a Template for Archive List
After the code has been developed, the next step is to create a new file called template-news.php in your theme folder. Once this file has been created, add the following code to it.
|
2 3 4 5 6 7 8 9 10 11 12 13 14 15 |
<?php /*Template Name: News*/ get_header(); query_posts(array( 'post_type' => 'news' )); ?> <?php while (have_posts()) : the_post(); ?> <h2><a href="<?php the_permalink() ?>"><?php the_title(); ?></a></h2> <p><?php the_excerpt(); ?></p> <?php endwhile; get_footer(); |
Select a Template
Now create a new page called News in your WordPress dashboard. Select the News Template from the Template option available in Page Attributes on the right side of your screen. For further reference, check out the image below and then click the Publish button.
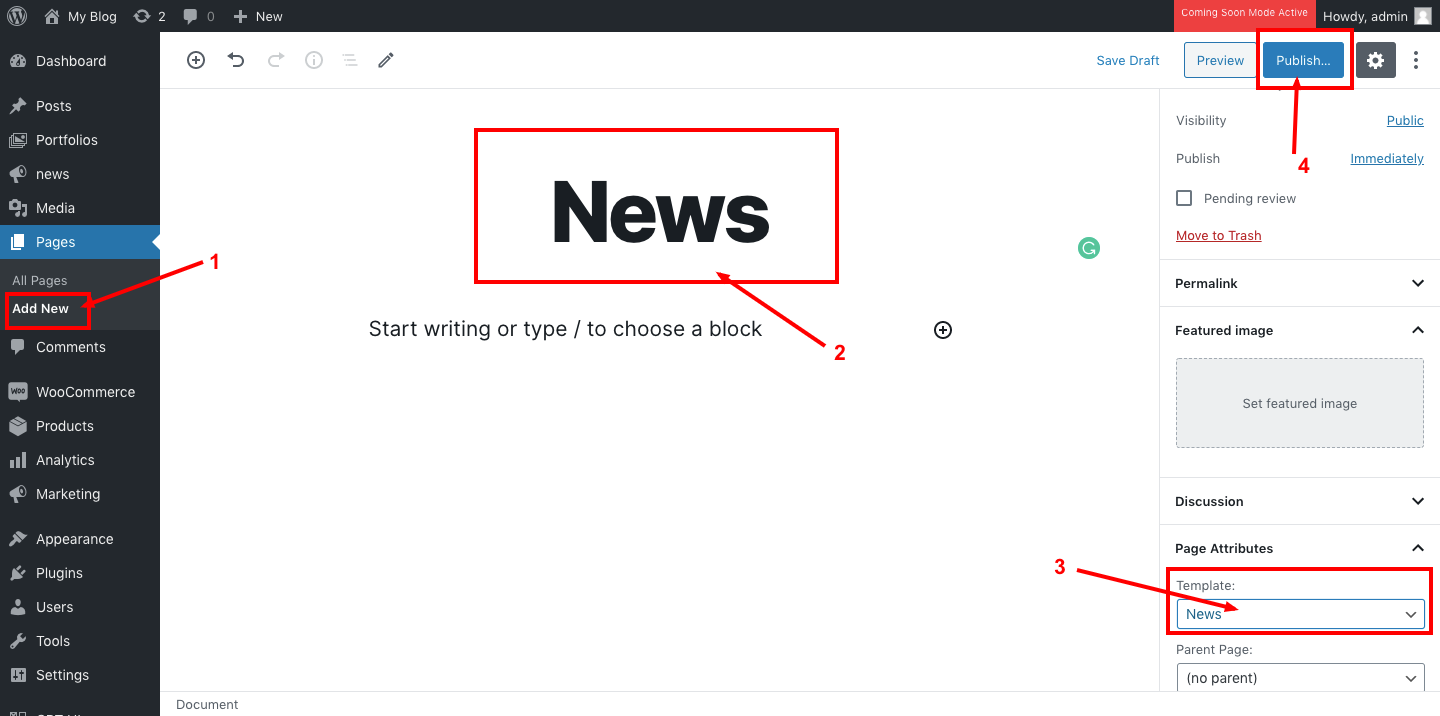
Create a News Post
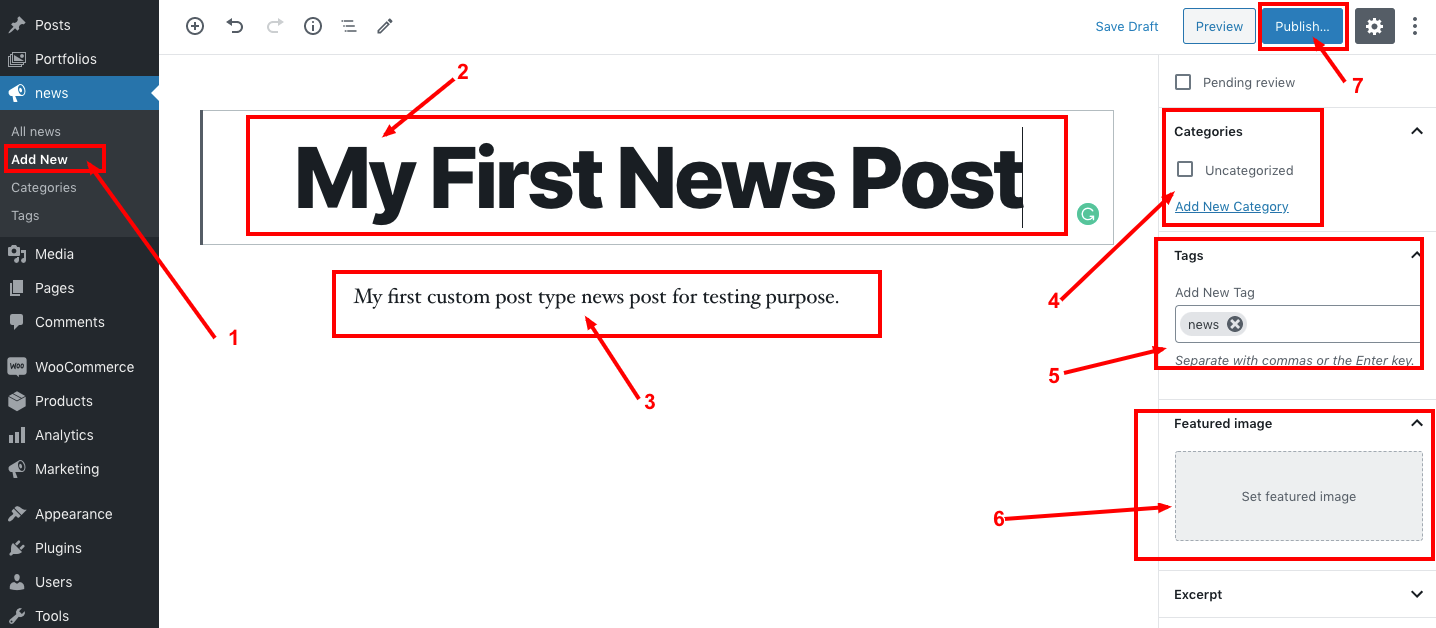
Now create a custom post type News first post in your WordPress website.
Create a Detail Page of Custom Post Type
We must also create a custom post types detail page. To do this, simply create a new file called single-news.php located in your WordPress theme and add the following code.
|
2 3 4 5 6 7 8 9 10 |
<?php get_header(); /* Start the Loop */ while (have_posts()) : the_post(); get_template_part('template-parts/content', get_post_format()); endwhile; // End of the loop. get_footer(); |
Let’s take a look at below code parts
|
2 3 4 |
get_template_part('template-parts/content', get_post_format()); |
In the above code, template-parts/content will depend on your theme content.php file location.
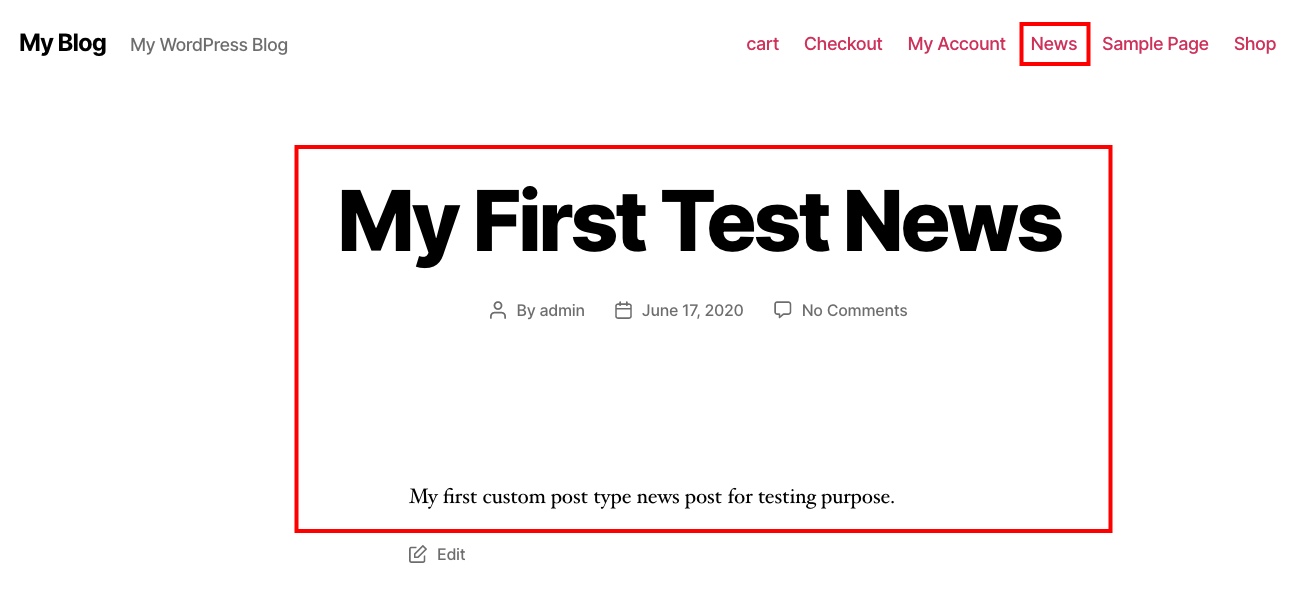
Now it’s time to see how your detail page looks like:
Also Read: How to Show Related Posts for Custom Post Type in WordPress
Wrapping Words!
Well, I hope you found Complete Steps to Create Custom Post Types in WordPress Without Plugin tutorial helpful for your project. Keep learning!. If you face any problem – I am here to solve your problems.
Are you want to get implementation help, or modify or extend the functionality of this script? Submit paid service request

Pradeep Maurya is the Professional Web Developer & Designer and the Founder of “Tutorials website”. He lives in Delhi and loves to be a self-dependent person. As an owner, he is trying his best to improve this platform day by day. His passion, dedication and quick decision making ability to stand apart from others. He’s an avid blogger and writes on the publications like Dzone, e27.co


