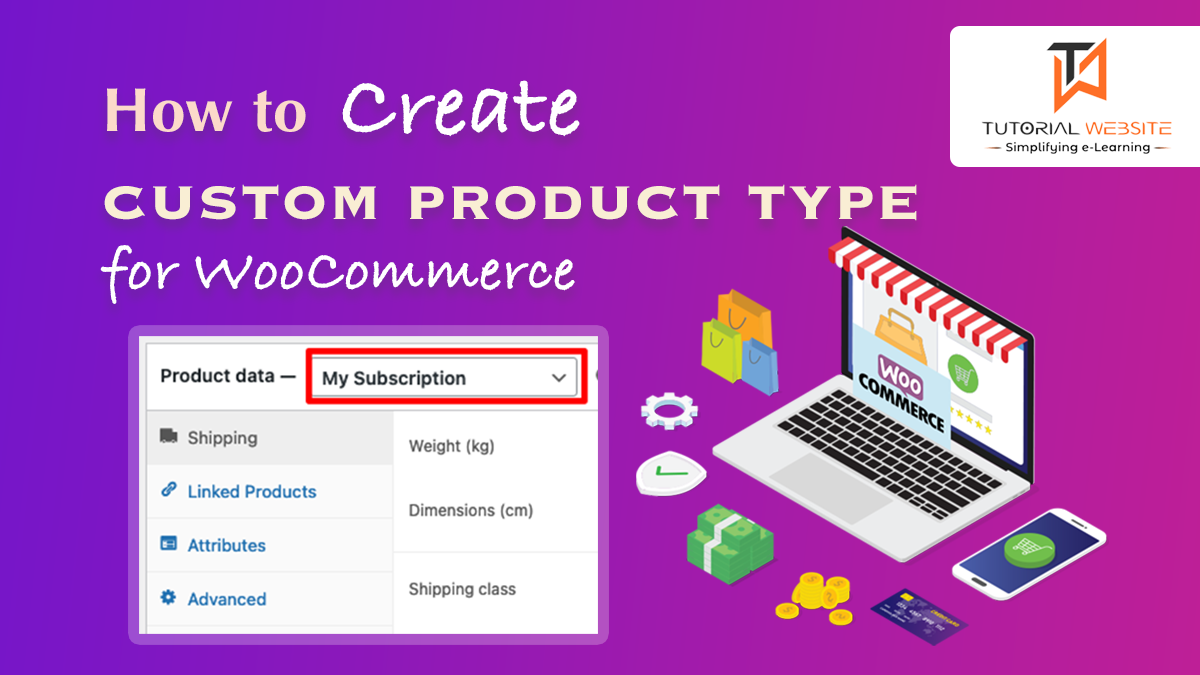
If you’ve used WooCommerce before, you should be aware that it offers four default product types: Simple product, Variable product, Group product, and External/Affiliate Product.
There’s a chance you’ll need to develop your own woocommerce custom product type if you’re working on a complex and customized solution using WooCommerce.
These woocommerce product types can be Appointment Bookings, Subscriptions, or something completely different.
You can customize the settings of a product if you have your own product type. For example, you can select default options for items like price, visibility, etc.
Suggested Read: Woocommerce hook to display offers text after shop loop item
WooCommerce: Add custom product type
If you want to learn how to create your own woocommerce custom product type, then this article is very important and helpful for you.
In this article, we will learn how to create a custom product type step by step:
- Register a new WooCommerce custom product type.
- Show Product Data General Tab Prices
- Add an associated product data tab, when selected.
- Display information on the front end of a single product page.
- Show Add to Cart Button
Before we start, I want to inform you that we will write all steps code under your theme functions.php file. Let’s start the process to create a custom product type.
Step-1: Register a new custom product type.
In this step, we will register our own custom product type class and extends the WooCommerce default class WC_Product.
PHP Snippet: Register a New Product Type @ WooCommerce Admin
Go to your theme or child theme folder and open the functions.php file for edit. Copy and Paste the below code snippets to your theme functions.php file.
|
2 3 4 5 6 7 8 9 10 11 12 13 14 15 |
add_action( 'init', 'register_my_subscription_product_type' ); function register_my_subscription_product_type() { class WC_Product_my_subscription extends WC_Product { public function __construct( $product ) { $this->product_type = 'my_subscription'; parent::__construct( $product ); } } } |
In the above code, we create a new product type as ‘my_subscription’ by extending the Woocommerce WC_Product class. Once the product type has been registered, it must be added to the product type selector so that customers can select the type of product they would like to create.
Add custom Product Type to Select Dropdown
Copy and Paste the below code snippets after the first code to your theme functions.php file.
|
2 3 4 5 6 7 8 9 10 11 12 13 14 |
/** * Add custom Product Type to Select Dropdown */ add_filter( 'product_type_selector', 'add_my_subscription_product_type' ); function add_my_subscription_product_type( $types ){ $types[ 'my_subscription' ] = __( 'My Subscription'); return $types; } |
Please refer below image for output

Step-2: Show Product Data General Tab Prices
In this step, we will code to display or hide other default attributes data panels like general, inventory, shipping, linked_product, variations, advanced
|
2 3 4 5 6 7 8 9 10 11 12 13 14 15 16 17 18 19 20 21 22 23 24 25 26 27 28 29 30 31 32 33 34 |
/** * Hide Attributes data panel. */ function wcs_hide_attributes_data_panel( $tabs) { // Other default values for 'attribute' are; general, inventory, shipping, linked_product, variations, advanced $tabs['general']['class'][] = 'show_if_my_subscription'; $tabs['attribute']['class'][] = 'hide_if_my_subscription'; $tabs['shipping']['class'][] = 'hide_if_my_subscription'; $tabs['inventory']['class'][] = 'show_if_my_subscription'; return $tabs; } /** * Show pricing fields for my_subscription product. */ function my_subscription_custom_js() { if ( 'product' != get_post_type() ) : return; endif; ?><script type='text/javascript'> jQuery( document ).ready( function() { jQuery( '.options_group.pricing' ).addClass( 'show_if_my_subscription' ).show(); jQuery( '.general_options' ).show(); }); </script><?php } add_action( 'admin_footer', 'my_subscription_custom_js' ); |
After adding the above code you can see the general attribute tab to add/edit product price. Please refer below image for output

Are you want to get implementation help, or modify or extend the functionality?
A Tutorialswebsite Expert can do it for you.
Step-3: Add an associated product data tab, when selected.
We are going to add a new tab to it and create fields named “Enable Subscription” and “Enter Subscription Details” that describe the product type.
|
2 3 4 5 6 7 8 9 10 11 12 13 14 15 16 17 18 19 20 21 22 23 24 25 26 27 28 29 30 31 32 33 34 35 36 37 38 39 40 41 |
add_filter( 'woocommerce_product_data_tabs', 'my_subscription_product_tab' ); function my_subscription_product_tab( $tabs) { $tabs['my_subscription'] = array( 'label' => __( 'My Subscription Tab', 'dm_product' ), 'target' => 'my_subscription_product_options', 'class' => 'show_if_my_subscription_product', ); return $tabs; } add_action( 'woocommerce_product_data_panels', 'QL_custom_product_options_product_tab_content' ); function QL_custom_product_options_product_tab_content() { // Dont forget to change the id in the div with your target of your product tab ?><div id='my_subscription_product_options' class='panel woocommerce_options_panel'><?php ?><div class='options_group'><?php woocommerce_wp_checkbox( array( 'id' => '_enable_custom_product', 'label' => __( 'Enable Subscription'), ) ); woocommerce_wp_text_input( array( 'id' => 'my_subscription_product_info', 'label' => __( 'Enter Subscription Details', 'dm_product' ), 'placeholder' => '', 'desc_tip' => 'true', 'description' => __( 'Enter subscription details.', 'dm_product' ), 'type' => 'text' ) ); ?></div> </div><?php } |
To save the above fields details we will use the hook ‘ woocommerce_process_product_meta’ and add save the data in the post meta as shown in below code snippet :
|
2 3 4 5 6 7 8 9 10 11 12 13 14 15 16 17 18 |
add_action( 'woocommerce_process_product_meta', 'save_my_subscription_product_settings' ); function save_my_subscription_product_settings( $post_id ){ //save checkbox infomation $engrave_text_option = isset( $_POST['_enable_custom_product'] ) ? 'yes' : 'no'; update_post_meta($post_id, '_enable_custom_product', esc_attr( $engrave_text_option )); // save text field information $my_subscription_product_info = $_POST['my_subscription_product_info1']; if( !empty( $my_subscription_product_info ) ) { update_post_meta( $post_id, 'my_subscription_product_info1', esc_attr( $my_subscription_product_info ) ); } } |
The work of the admin panel has been completed.
You are now able to choose the newly registered post type, view the tab, and then enter the details in the field as shown in the screenshot below:

Step-4: Display information on the front end of a single product page.
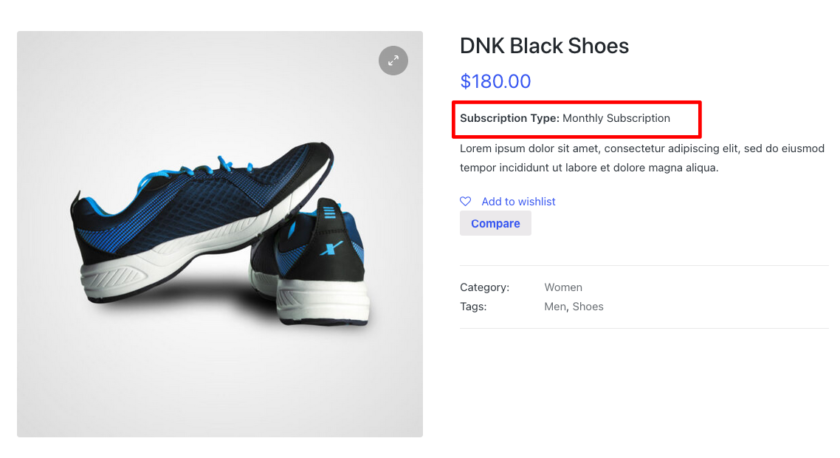
On the single product page, we need to display the details that we added to the subscription product type. We will use “woocommerce_single_product_summary” hook to display the details on the front end. Copy and paste below code snippet:
|
2 3 4 5 6 7 8 9 10 11 |
add_action( 'woocommerce_single_product_summary', 'my_subscription_product_front' ); function my_subscription_product_front () { global $product; if ( 'my_subscription' == $product->get_type() ) { echo "<strong>Subscription Type: </strong>".( get_post_meta( $product->get_id(), 'my_subscription_product_info' )[0] ); } } |
Please refer below screenshot for the output
Step-5: Show Add to Cart Button
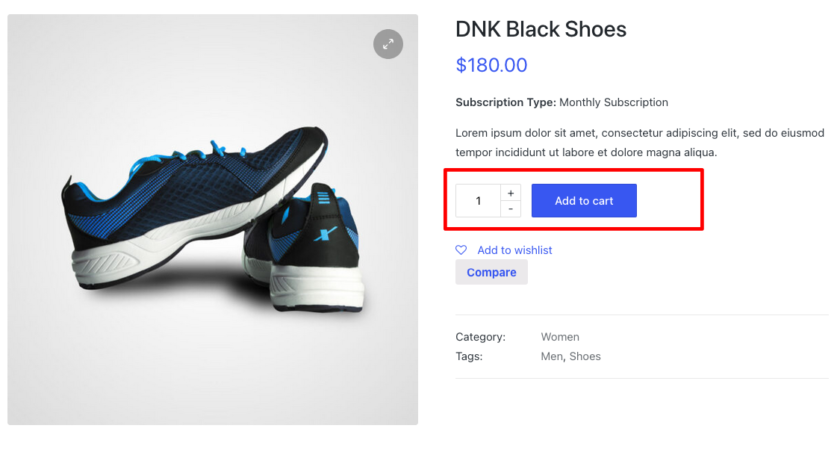
This is our final/last step where we will add code for add to cart button. Let’s copy and paste below code snippets.
|
2 3 4 5 6 7 8 |
// #5 Show Add to Cart Button add_action( "woocommerce_my_subscription_add_to_cart", function() { do_action( 'woocommerce_simple_add_to_cart' ); }); |
Wow, Now we can see the subscription product that we created in the backend with the information is ready to purchase for customers. Please Refer to the below screenshot.
Also Read: How to Create a Custom Payment Gateway Plugin for Woocommerce?
Are you want to get implementation help, or modify or extend the functionality?
A Tutorialswebsite Expert can do it for you.
Wrapping Words
Thanks for reading 🙏, I hope you found the How to Create WooCommerce custom product type tutorial helpful for your project. Keep learning! If you face any problems – I am here to solve your problems.
FAQs
Simple product, Variable product, Group product, and External/Affiliate Product is the default product types in WooCommerce.
As you know Simple product, Variable product, Group product, and External/Affiliate Product is the default product types.
Same as custom Product types can be various things such as Appointment Bookings, Subscriptions, Tickets, or something completely different. It totally depends on you what name you want to define for the custom product type.
Create custom product type step by step:
1. Register a new WooCommerce custom product type.
2. Show Product Data General Tab Prices
3. Add an associated product data tab, when selected.
4. Display information on the front end of a single product page.
5. Show Add to Cart Button

Pradeep Maurya is the Professional Web Developer & Designer and the Founder of “Tutorials website”. He lives in Delhi and loves to be a self-dependent person. As an owner, he is trying his best to improve this platform day by day. His passion, dedication and quick decision making ability to stand apart from others. He’s an avid blogger and writes on the publications like Dzone, e27.co


