Drag and drop file upload is a very successful way to make your web application user-friendly. Generally, this feature allows you to drag an element and drop it to a different location on the web page. The drag and drop function can be used for a number of purposes in the web application. Drag & Drop is the best choice if you want to make file upload features more interactive.
DropzoneJS is an open-source JavaScript library that enables a drop-down HTML feature. This means that the user can drag and drop files from the device to this HTML feature.
DropzoneJS does not handle the file upload feature but sends files to the server through AJAX. You need to use PHP to upload files to your server. In this tutorial, we’ll teach you how to integrate drag and drop upload files using Dropzone JS, PHP, and MySQL.
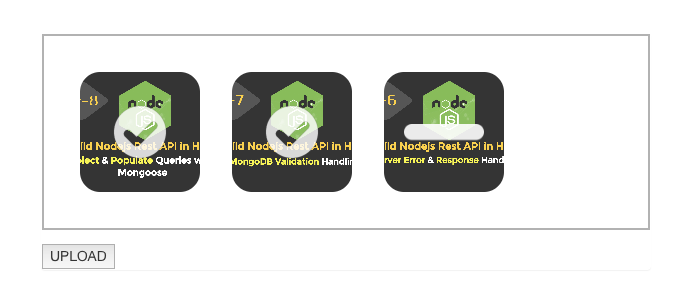
DropzoneJS offers a simple way to combine drag and drop multiple file uploads with a preview of the web application. Dropzone is flexible and does not depend on any other jQuery library.
The following steps will be followed to implement the drag & drop file upload functionality.
- Droppable element to select multiple files from the computer or device.
- Preview of the selected files or images.
- Upload files to the server & Insert files information in the database using PHP & MySQL.
Before getting started, take a look at the file structure of drag & drop file upload with PHP.
|
2 3 4 5 6 7 8 9 10 11 12 |
drag_drop_file_upload_with_php/ ├── dbconfig.php ├── index.php ├── upload.php ├── uploads/ ├── js/ │ ├── dropzone.min.js └── css/ └── dropzone.min.css |
Create Database Table
A table is required in the database to store the details of the uploaded file. The following SQL generates a table with some basic fields in the MySQL database.
|
2 3 4 5 6 7 8 9 |
CREATE TABLE `files` ( `id` int(11) NOT NULL AUTO_INCREMENT, `file_name` varchar(255) COLLATE utf8_unicode_ci NOT NULL, `uploaded_on` datetime NOT NULL, PRIMARY KEY (`id`) ) ENGINE=InnoDB DEFAULT CHARSET=utf8 COLLATE=utf8_unicode_ci; |
Create Database Configuration (dbconfig.php)
The dbconfig.php file is used to connect and select the database. Specify the database hostname ($dbHost), username ($dbUsername), password ($dbPassword), and name ($dbName) as per your MySQL database credentials.
|
2 3 4 5 6 7 8 9 10 11 12 13 14 15 16 17 18 |
<?php // Database configuration $host = "localhost"; $dbuser = "Database Username"; $dbpass = "Database password"; $dbname = "Database Name"; // Create database connection $conn = new mysqli($host, $dbuser, $dbpass, $dbname); // Check connection if ($conn->connect_error) { die("Connection failed: " . $conn->connect_error); } ?> |
Create file (index.php) to Drag and Drop File Upload
The Dropzone JS library will be used to integrate the Drag&Drop feature, so first include the Dropzone JS library and the CSS library.
|
2 3 4 5 6 7 8 9 10 11 12 13 14 15 16 17 18 19 20 21 22 23 24 25 26 27 28 29 30 31 32 33 34 35 36 37 38 39 40 41 42 43 44 45 46 47 48 49 50 51 |
<html> <head> <title>Drag and Drop File Upload using DropzoneJS, PHP & MySQL</title> <link href="https://maxcdn.bootstrapcdn.com/bootstrap/3.3.7/css/bootstrap.min.css" rel="stylesheet" media="screen"> <link rel="stylesheet" type="text/css" href="css/dropzone.min.css" /> <script type="text/javascript" src="js/dropzone.min.js"></script> </head> <body> <div class="col-md-12"> <div class="content"> <div class="col-lg-12"> <div class="panel"> <div class="image_upload_div"> <form action="upload.php" class="dropzone"> <div class="dz-message"> Drop files here or click to upload.<br> <span class="note">(This is for demo purpose. Selected files are not actually uploaded.)</span> </div> </form> <button id="startUpload">UPLOAD</button> </div> </div></div></div> </div> <script> //Disabling autoDiscover Dropzone.autoDiscover = false; $(function() { //Dropzone class var myDropzone = new Dropzone(".dropzone", { url: "upload.php", paramName: "file", maxFilesize: 2, maxFiles: 10, acceptedFiles: "image/*,application/pdf", autoProcessQueue: false }); $('#startUpload').click(function(){ myDropzone.processQueue(); }); }); </script> </div> </body> </html> |
In the above code, Initialize the Dropzone class and specify the configuration as per your needs.
- url – File path where the files will be submitted for server-side upload.
- paramName – The name of the file input field.
- maxFilesize – Maximum size of the file allowed to upload.
- maxFiles – Maximum number of files allowed to upload.
- acceptedFiles – A comma-separated list of allowed mime types.
- Use the
autoProcessQueueoption and processQueue method to submit files on button click. - Set the
autoProcessQueueoption to false, that tells Dropzone not to upload the file on the drop. - Call
processQueue()method to start sending files.
Create (upload.php) to Upload Files to the Server using AJAX
Also Read: Ajax File Upload with Progress Bar using PHP and JQuery
Dropzone sends the all dropped files to the server using ajax file (upload.php) to handle the upload process.
- Receive posted file data using the PHP $_FILES method.
- Upload files to the server using move_uploaded_file() function in PHP.
- Insert the uploaded file info in the database.
|
2 3 4 5 6 7 8 9 10 11 12 13 14 15 16 17 18 19 20 21 |
<?php if(!empty($_FILES)){ // Include the database configuration file require 'dbconfig.php'; // File path configuration $uploadDir = "uploads/"; $fileName = basename($_FILES['file']['name']); $uploadFilePath = $uploadDir.$fileName; // Upload file to server if(move_uploaded_file($_FILES['file']['tmp_name'], $uploadFilePath)){ // Insert file information in the database $sql = "INSERT INTO files (file_name, uploaded_on) VALUES ('".$fileName."', NOW())"; $insert = $conn->query($sql); } } ?> |
Check Live Demo Layout

ALSO READ: Reduce Image Size Before Upload Using PHP
Conclusion:
Drag and drop file upload script provides a user-friendly way to upload images or files to the server. The above code helps you to upload multiple images or files to the server without page refresh using Dropzone and PHP.
Are you want to get implementation help, or modify or extend the functionality of this script? Submit paid service request

Pradeep Maurya is the Professional Web Developer & Designer and the Founder of “Tutorials website”. He lives in Delhi and loves to be a self-dependent person. As an owner, he is trying his best to improve this platform day by day. His passion, dedication and quick decision making ability to stand apart from others. He’s an avid blogger and writes on the publications like Dzone, e27.co


