


In today’s digital age, providing users with a quick, secure, and seamless payment experience is critical for any online business. PhonePe, one of India’s most popular digital payment platforms, now includes a robust Standard Checkout system in its V2 API version. This standard checkout system aims to simplify the payment process for customers while adhering to industry standards and optimizing transaction security.
In this article, we will walk you through the steps required to integrate the PhonePe V2 Standard Checkout into your PHP-based website or web application. From generating authentication tokens to initiating transactions and handling payment responses, you’ll learn how to build a secure, production-ready integration that meets PhonePe’s most recent standards.
Are you want to get implementation help, or modify or extend the functionality?
A Tutorialswebsite Expert can do it for you.
Integrate PhonePe V2 Standard Checkout in PHP
Step 1: Generate Authorization Token
If you’re integrating PhonePe’s payment gateway into your application, you must ensure that communication between your server and PhonePe’s backend is secure. To achieve this, you must first generate an Auth Token, which is used to authorize all coming API requests.
An auth token is a security signature that authorizes requests from your backend to PhonePe. It is generated based on your client_id, client_version, client_secret, and grant_type.
To get this details

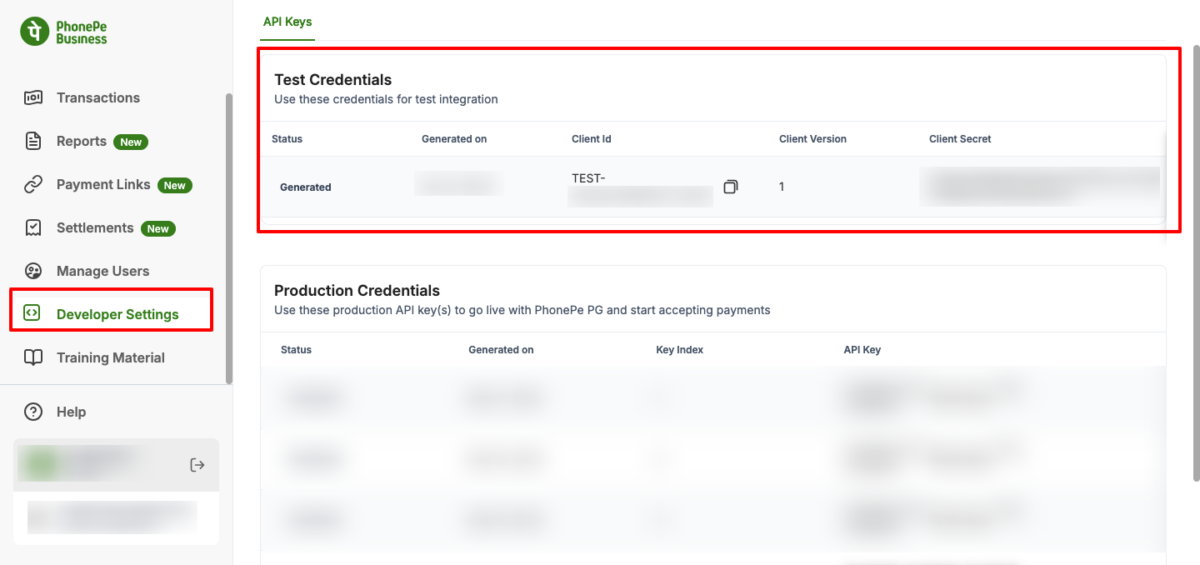
Create a file named “accessToken.php” and copy and paste the below code
|
2 3 4 5 6 7 8 9 10 11 12 13 14 15 16 17 18 19 20 21 22 23 24 25 26 27 28 29 30 31 32 33 34 35 36 37 38 39 40 41 42 43 44 |
<?php $client_id="YOUR_CLIENT_ID"; $client_version=1; $client_secret="YOUR_SECRET_ID"; $grant_type="client_credentials"; $curl = curl_init(); curl_setopt_array($curl, array( CURLOPT_URL => 'https://api-preprod.phonepe.com/apis/pg-sandbox/v1/oauth/token', CURLOPT_RETURNTRANSFER => true, CURLOPT_ENCODING => '', CURLOPT_MAXREDIRS => 10, CURLOPT_TIMEOUT => 0, CURLOPT_FOLLOWLOCATION => true, CURLOPT_HTTP_VERSION => CURL_HTTP_VERSION_1_1, CURLOPT_CUSTOMREQUEST => 'POST', CURLOPT_POSTFIELDS => 'client_id='.$client_id.'&client_version='.$client_version.'&client_secret='.$client_secret.'&grant_type='.$grant_type, CURLOPT_HTTPHEADER => array( 'Content-Type: application/x-www-form-urlencoded' ), )); $response = curl_exec($curl); curl_close($curl); $getToken=json_decode($response, true) ; //echo $getToken['access_token']; if(isset($getToken['access_token']) && $getToken['access_token'] !=''){ $accessToken=$getToken['access_token']; $expires_at=$getToken['expires_at']; // Save this details in the database to use access token and check expiry }else{ $accessToken=''; $expires_at=''; } ?> |
Note: Don’t forget to replace your authentication details and also for production mode, must need to replace UAT Host URL with Production Host URL. Check here
Step-2: Initiate Payment Request
When you will receive the access token from step-1, then now we need to create payment and initiate the payment request.
Create a page named “index.php” and copy-paste the below code.
|
2 3 4 5 6 7 8 9 10 11 12 13 14 15 16 17 18 19 20 21 22 23 24 25 26 27 28 29 30 31 32 33 34 35 36 37 38 39 40 41 42 43 44 45 46 47 48 49 50 51 52 53 54 55 56 57 58 59 60 61 62 63 64 65 66 67 68 69 70 71 72 73 74 75 76 77 78 79 80 81 82 83 84 85 86 87 88 89 90 91 92 93 94 95 96 97 98 99 |
<?php include 'accessToken.php'; $morderid=uniqid(); $curl = curl_init(); curl_setopt_array($curl, array( CURLOPT_URL => 'https://api-preprod.phonepe.com/apis/pg-sandbox/checkout/v2/pay', CURLOPT_RETURNTRANSFER => true, CURLOPT_ENCODING => '', CURLOPT_MAXREDIRS => 10, CURLOPT_TIMEOUT => 0, CURLOPT_FOLLOWLOCATION => true, CURLOPT_HTTP_VERSION => CURL_HTTP_VERSION_1_1, CURLOPT_CUSTOMREQUEST => 'POST', CURLOPT_POSTFIELDS =>'{ "merchantOrderId": "'.$morderid.'", "amount": 1000, "expireAfter": 1200, "metaInfo": { "udf1": "test1", "udf2": "new param2", "udf3": "test3", "udf4": "dummy value 4", "udf5": "addition infor ref1" }, "paymentFlow": { "type": "PG_CHECKOUT", "message": "Payment message used for collect requests", "merchantUrls": { "redirectUrl": "https://www.tutorialswebsite.com/" } } }', CURLOPT_HTTPHEADER => array( 'Content-Type: application/json', 'Authorization: O-Bearer '.$accessToken ), )); $response = curl_exec($curl); curl_close($curl); $getPaymentInfo=json_decode($response,true); if(isset($getPaymentInfo['redirectUrl']) && $getPaymentInfo['redirectUrl'] !=''){ $orderid=$getPaymentInfo['orderId']; $redirectTokenurl=$getPaymentInfo['redirectUrl']; ?> <!DOCTYPE html> <html lang="en"> <head> <meta charset="UTF-8"> <meta name="viewport" content="width=device-width, initial-scale=1.0"> <title>PhonePe Payment</title> <script src="https://mercury.phonepe.com/web/bundle/checkout.js"></script> </head> <body> <h4>PhonePe Payment Integration</h4> <button id="payButton">Pay Now</button> <script> document.getElementById('payButton').addEventListener('click', function () { // Manually enter your PhonePe payment URL here var tokenUrl = '<?php echo $redirectTokenurl;?>' function paymentCallback(response) { if (response === 'USER_CANCEL') { alert('Payment was cancelled by the user.'); } else if (response === 'CONCLUDED') { alert('Payment done successfully.'); window.location.href='/payment_success.php?orderid=<?php echo $orderid;?>&moid=<?php echo $morderid;?>'; } } if (window.PhonePeCheckout && window.PhonePeCheckout.transact) { window.PhonePeCheckout.transact({ tokenUrl: tokenUrl, callback: paymentCallback, type: 'IFRAME' }); } else { alert('PhonePeCheckout is not available.'); } }); </script> </body> </html> <?php } ?> |
Output:

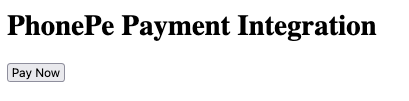
When the user clicks the Pay button, the PhonePe Standard Checkout will open in an iframe.

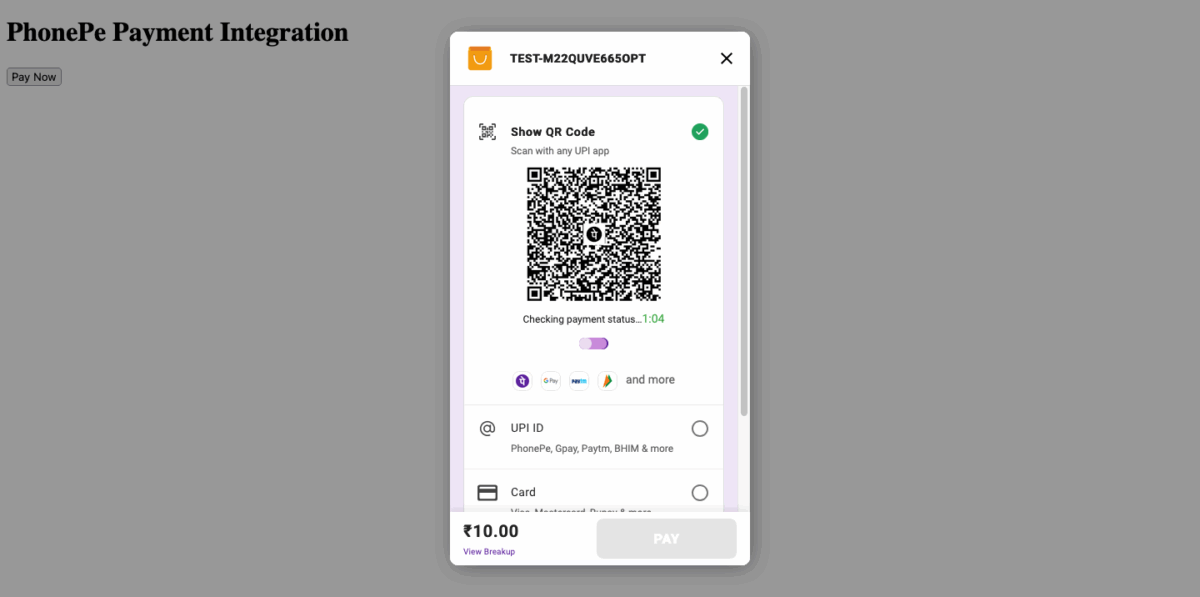
Upon completing the payment, the user will be redirected to the success page defined in the code above.
“card_number”: “4242424242424242”,
“Name”: “Test”
“card_type”: “DEBIT_CARD”,
“expiry_month”: 12,
“expiry_year”: 2027,
“cvv”: “936”
Get a professionally designed and developed website tailored to your needs.
As an experienced website developer based in Delhi NCR, I offer customized solutions to build responsive, SEO-friendly, and user-friendly websites. Whether it’s for a personal blog, business site, or e-commerce store, I ensure your online presence stands out.
Step 3: Handle Payment Response
Next, we’ll create a payment_success.php page to handle the payment response, display a success message to the customer, and store the transaction details in the database.
Copy and paste the below code to handle the transaction response and validate it. Checkout PhonePe API Document
|
2 3 4 5 6 7 8 9 10 11 12 13 14 15 16 17 18 19 20 21 22 23 24 25 26 27 28 29 30 |
// fetch token from database and use here to validate the transaction status $accessToken="GET_FROM_DATABASE"; $curl = curl_init(); curl_setopt_array($curl, array( CURLOPT_URL => 'https://api-preprod.phonepe.com/apis/pg-sandbox/checkout/v2/order/'.$_GET["moid"].'/status', CURLOPT_RETURNTRANSFER => true, CURLOPT_ENCODING => '', CURLOPT_MAXREDIRS => 10, CURLOPT_TIMEOUT => 0, CURLOPT_FOLLOWLOCATION => true, CURLOPT_HTTP_VERSION => CURL_HTTP_VERSION_1_1, CURLOPT_CUSTOMREQUEST => 'GET', CURLOPT_HTTPHEADER => array( 'Content-Type: application/json', 'Authorization: O-Bearer '.$accessToken ), )); $response = curl_exec($curl); curl_close($curl); $getInfo=json_decode($response,true); print_r($getInfo); |
Transaction details:


Do you want to get implementation help, or modify or extend the functionality of this script? Submit a paid service request
Wrapping Words
Once you’ve configured token generation, payment creation, and response handling, it’s easy to integrate PhonePe V2 Standard Checkout with PHP. Always test in a sandbox before going live.
Related Article:
- Integrate Cashfree Payment Gateway in PHP
- Integrating Razorpay Payment Gateway in PHP
- How to Generate Dynamic QR Code with Razorpay API in PHP


Pradeep Maurya is the Professional Web Developer & Designer and the Founder of “Tutorials website”. He lives in Delhi and loves to be a self-dependent person. As an owner, he is trying his best to improve this platform day by day. His passion, dedication and quick decision making ability to stand apart from others. He’s an avid blogger and writes on the publications like Dzone, e27.co