Integrating a payment gateway is a crucial step for any online business that wants to accept payments securely. Cashfree is a popular payment gateway in India that allows businesses to collect payments online. This article will get the complete process to Integrate Cashfree Payment Gateway in your PHP-based application. Whether you are developing an e-commerce platform, a subscription service, or any other online business, this guide will help you set up a secure payment processing system using Cashfree.
Cashfree is one of the leading payment gateways in India, known for its reliability, speed, and comprehensive range of services. It supports multiple payment modes, including credit/debit cards, net banking, UPI, and popular wallets, making it a versatile choice for businesses.
Suggested Read: How to Integrate PhonePe Payment Gateway in PHP
A Step-by-Step Guide: Integrate Cashfree payment gateway to your PHP website
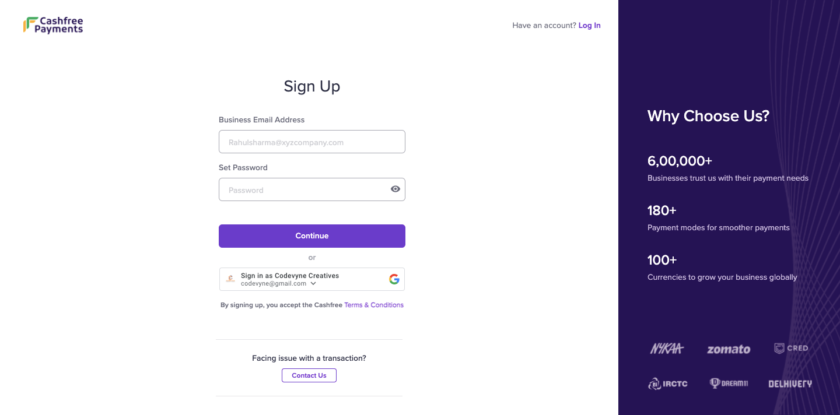
Step 1: Create a Cashfree account
If you don’t have an account, sign up for a Cashfree account at https://merchant.cashfree.com/merchants/signup
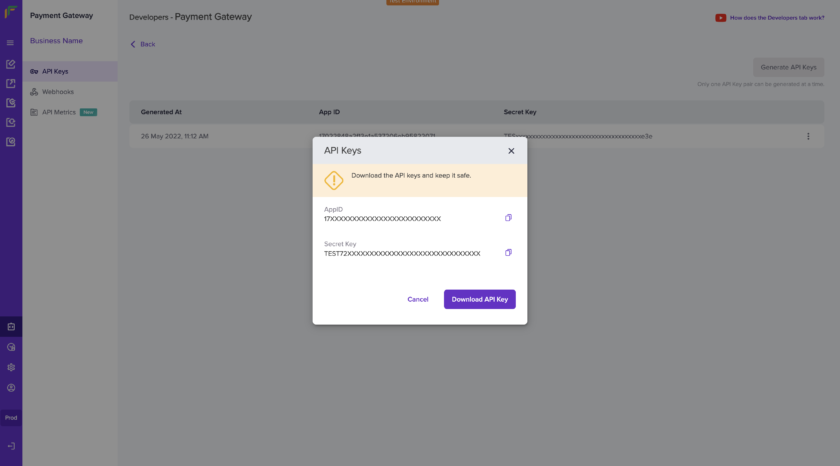
Step 2: Get API Keys
- Log in to your Cashfree Dashboard.
- Go to Payment Gateway Dashboard > and click on Developers> API Keys.
- Click API Keys under Payment Gateway.
- In test environment API keys will be auto-generated. In prod-environment you need to click on Generate API Keys
Obtain the API keys (App ID and Secret Key)
Also Read: Integrating Razorpay Payment Gateway in PHP
Step 3: Database Configuration & Create Table
Create a file named config.php to add database connection. Copy and paste the below code
|
2 3 4 5 6 7 8 9 10 11 12 13 14 15 16 |
/************** database configuration **************/ $host="localhost"; $dbName="database_name"; $dbUser="database_username"; $dbpass="db_password"; $con = mysqli_connect($host,$dbUser,$dbpass,$dbName); // Check connection if (mysqli_connect_errno()) { echo "Failed to connect to MySQL: " . mysqli_connect_error(); exit(); } |
Also create a table to insert payment details. Please use below code to create a table “cashfree_payment”
|
2 3 4 5 6 7 8 9 10 11 12 13 14 15 16 17 18 19 20 21 22 23 24 25 |
CREATE TABLE `cashfree_payment` ( `id` int(255) NOT NULL, `order_id` varchar(255) COLLATE utf8_unicode_ci NOT NULL, `order_amount` varchar(255) COLLATE utf8_unicode_ci NOT NULL, `customer_id` varchar(255) COLLATE utf8_unicode_ci NOT NULL, `customer_name` varchar(255) COLLATE utf8_unicode_ci NOT NULL, `customer_email` varchar(255) COLLATE utf8_unicode_ci NOT NULL, `customer_phone` varchar(255) COLLATE utf8_unicode_ci NOT NULL, `cf_order_id` varchar(255) COLLATE utf8_unicode_ci NOT NULL, `payment_session_id` text COLLATE utf8_unicode_ci NOT NULL, `payment_status` varchar(255) COLLATE utf8_unicode_ci NOT NULL, `payment_time` varchar(255) COLLATE utf8_unicode_ci NOT NULL, `callback_response` text COLLATE utf8_unicode_ci NOT NULL, `created_on` timestamp NOT NULL DEFAULT CURRENT_TIMESTAMP ON UPDATE CURRENT_TIMESTAMP ) ENGINE=InnoDB DEFAULT CHARSET=utf8 COLLATE=utf8_unicode_ci; ALTER TABLE `cashfree_payment` ADD PRIMARY KEY (`id`); ALTER TABLE `cashfree_payment` MODIFY `id` int(255) NOT NULL AUTO_INCREMENT, AUTO_INCREMENT=1; COMMIT; |
Are you want to get implementation help, or modify or extend the functionality?
A Tutorialswebsite Expert can do it for you.
Step 4: Create your HTML form to get the customer details
Let’s create a bootstrap normal form to get customer information and amount details.
|
2 3 4 5 6 7 8 9 10 11 12 13 14 15 16 17 18 19 20 21 22 23 24 25 26 27 28 29 30 31 32 33 34 35 36 37 38 39 40 41 42 43 44 45 46 47 48 49 50 |
<!DOCTYPE html> <html> <head> <title>How to Integrate Cashfree payment gateway in PHP | tutorialswebsite.com</title> <link href="https://maxcdn.bootstrapcdn.com/bootstrap/3.3.7/css/bootstrap.min.css" rel="stylesheet" media="screen"> <script src="https://ajax.googleapis.com/ajax/libs/jquery/1.12.4/jquery.min.js"></script> <script type="text/javascript" src="https://maxcdn.bootstrapcdn.com/bootstrap/3.3.7/js/bootstrap.min.js"></script> </head> <body style="background-repeat: no-repeat;"> <div class="container"> <div class="row"> <div class="col-xs-12 col-md-12"> <div class="panel panel-default"> <div class="panel-heading"> <h4 class="panel-title">Charge Rs.10 INR </h4> </div> <div class="panel-body"> <form action="pay.php" method="post"> <div class="form-group"> <label>Name</label> <input type="text" class="form-control" name="cust_name" id="cust_name" placeholder="Enter name" required="" autofocus=""> </div> <div class="form-group"> <label>Email</label> <input type="email" class="form-control" name="email" id="email" placeholder="Enter email" required=""> </div> <div class="form-group"> <label>Mobile Number</label> <input type="number" class="form-control" name="mobile" id="mobile" min-length="10" max-length="10" placeholder="Enter Mobile Number" required="" autofocus=""> </div> <div class="form-group"> <label>Payment Amount</label> <input type="text" class="form-control" name="amount" id="amount" value="10" placeholder="Enter Amount" required="" autofocus=""> </div> <!-- submit button --> <button id="PayNow" class="btn btn-success btn-lg btn-block" >Submit & Pay</button> </form> </div> </div> </div> </div> </div> </body> </html> |
Step 5: Generate Payment Request
Create a PHP script (pay.php) to handle the form submission and generate a payment request. You also need to replace your Cashfree API Key (App ID and Secret Key) details for test and production mode.
|
2 3 4 5 6 7 8 9 10 11 12 13 14 15 16 17 18 19 20 21 22 23 24 25 26 27 28 29 30 31 32 33 34 35 36 37 38 39 40 41 42 43 44 45 46 47 48 49 50 51 52 53 54 55 56 57 58 59 60 61 62 63 64 65 66 67 68 69 70 71 72 73 74 75 76 77 78 79 80 81 82 83 84 85 86 87 88 89 90 91 92 93 94 95 96 97 98 99 100 101 102 103 104 105 106 107 108 109 110 111 112 113 114 115 116 117 118 119 120 121 122 123 124 125 126 127 128 129 130 131 132 133 134 135 136 137 138 139 140 141 142 143 144 145 146 147 148 149 150 151 152 153 154 155 156 157 158 159 160 161 162 163 |
<?php include 'config.php'; // Enter Your website domain url $base_url="https://tutorialswebsite.com/cashfree"; /******************* Cashfree API Details ***************/ $payMode="sandbox"; // for live change it to "production" if($payMode=='production'){ // live api details define('client_id',"Your_Live_Client_ID"); define('secret_key',"Your_Live_Secret_Key"); $APIURL="https://api.cashfree.com/pg/orders"; }else{ // test api details define('client_id',"Your_Test_Client_ID"); define('secret_key',"Your_Test_Secret_Key"); $APIURL="https://sandbox.cashfree.com/pg/orders"; } //===========*********************============ if(isset($_POST['amount']) && $_POST['amount'] !='' && $_POST['mobile'] !='' && $_POST['cust_name'] !='' && $_POST['email'] !=''){ function generateOrderId($prefix = '') { // Use uniqid with more entropy $uniqid = uniqid($prefix, true); $randomNumber = mt_rand(100000, 999999); $orderId = $uniqid . $randomNumber; $orderId = hash('sha256', $orderId); $orderId = substr($orderId, 0, 20); return strtoupper($orderId); } $orderId = generateOrderId('ORD_'); $orderAmount=$_POST['amount']; $customer_id=uniqid(); $customer_name=$_POST['cust_name']; $customer_email=$_POST['email']; $customer_phone=$_POST['mobile']; $paymentSessionId=''; $curl = curl_init(); curl_setopt_array($curl, array( CURLOPT_URL => $APIURL, CURLOPT_RETURNTRANSFER => true, CURLOPT_ENCODING => '', CURLOPT_MAXREDIRS => 10, CURLOPT_TIMEOUT => 0, CURLOPT_FOLLOWLOCATION => true, CURLOPT_HTTP_VERSION => CURL_HTTP_VERSION_1_1, CURLOPT_CUSTOMREQUEST => 'POST', CURLOPT_POSTFIELDS =>'{ "order_id":"'.$orderId.'", "order_amount": '.$orderAmount.', "order_currency": "INR", "customer_details": { "customer_id": "'.$customer_id.'", "customer_name": "'.$customer_name.'", "customer_email": "'.$customer_email.'", "customer_phone": "'.$customer_phone.'" }, "order_meta": { "return_url": "'.$base_url.'/success.php?order_id='.$orderId.'", "notify_url":"'.$base_url.'/callback.php", "payment_methods": "cc,dc,upi" } }', CURLOPT_HTTPHEADER => array( 'X-Client-Secret: '.secret_key, 'X-Client-Id: '.client_id, 'Content-Type: application/json', 'Accept: application/json', 'x-api-version: 2023-08-01' ), )); $response = curl_exec($curl); curl_close($curl); //echo $response; $resData=json_decode($response); if(isset($resData->cf_order_id) && $resData->cf_order_id !=''){ $cf_order_id=$resData->cf_order_id; $order_id=$resData->order_id; $payment_session_id=$resData->payment_session_id; $paymentSessionId=$payment_session_id; /***** insert payment details ***********/ //write your database insert query here /******* end here **********/ }else{ echo $response; } ?> <?php if(isset($paymentSessionId) && $paymentSessionId !=''){ ?> <!DOCTYPE html> <html lang="en"> <head> <script src="https://sdk.cashfree.com/js/v3/cashfree.js"></script> </head> <body> <div class="infoBox"> <h5>Confirm Your Details</h5> <table> <tr><td>Name</td><td>:</td><td><?php echo $customer_name;?></td></tr> <tr><td>Email</td><td>:</td><td><?php echo $customer_email;?></td></tr> <tr><td>Mobile No.</td><td>:</td><td><?php echo $customer_phone;?></td></tr> <tr><td>Pay Amount</td><td>:</td><td style="color:green;font-weight:bold;font-size:18px;"><?php echo "Rs. ".$orderAmount;?></td></tr> <tr><td colspan="3"><button type="button" id="renderBtn"> Confirm & Pay </button></td></tr> </table> </div> </body> <script> const cashfree = Cashfree({ mode: "<?php echo $payMode?>" //or production, }); document.getElementById("renderBtn").addEventListener("click", () => { cashfree.checkout({ paymentSessionId: "<?php echo $paymentSessionId?>" }); }); </script> </html> <?php } }else{ echo "<h5>Payment request failed</h5>"; } ?> |
In the above code you will get return_url work as redirect url after successful payment and notify_url will work as callback or webhook url to push or receive payment status in json format.
Related Article: How to Integrate PhonePe Payment Gateway in Laravel
Step-6: Handle Webhooks or Callback
You have to create callback.php file to handle asynchronous notifications from Cashfree. Copy and Paste below code
|
2 3 4 5 6 7 8 9 10 11 12 13 14 15 16 17 18 19 20 21 22 23 24 25 26 27 28 29 30 31 32 33 34 35 36 |
<?php include 'config.php'; // Log the webhook request to a file for debugging //file_put_contents('webhook.log', file_get_contents('php://input') . "\n", FILE_APPEND); // Read the incoming POST data $input = file_get_contents('php://input'); $data = json_decode($input, true); if ($data) { // Process the data as needed // For example, you can log the data or store it in a database $orderid=$data['data']['order']['order_id']; $payment_time=$data['data']['payment']['payment_time']; $orderStatus=$data['data']['payment']['payment_status']; /******** update payment Status **********/ //write your database update query here /************** end payment status ***************/ // file_put_contents('data.log', print_r($data, true), FILE_APPEND); // Respond to the webhook sender http_response_code(200); echo json_encode(['status' => 'success']); } else { // Invalid data http_response_code(400); echo json_encode(['status' => 'invalid data']); } ?> |
Step-7: Handle Payment Response
After a successful payment process, users will be redirected to a success page. In the pay.php file you will get return_url above, once you receive the success response, you’ll need to redirect the user to the success.php page.
Use the below success.php file code
|
2 3 4 5 6 7 8 9 10 11 12 13 14 15 16 17 18 19 20 21 22 23 24 25 26 27 28 29 30 31 32 33 34 35 36 37 38 39 40 41 42 43 44 45 46 47 48 49 50 51 52 53 54 55 56 57 58 59 60 61 62 63 64 65 66 67 68 69 70 71 72 73 74 75 76 77 78 79 80 81 82 83 84 85 86 87 88 89 90 91 92 93 |
<?php include 'config.php'; ?> <!DOCTYPE html> <html lang="en"> <head> <meta charset="UTF-8" /> <meta name="viewport" content="width=device-width, initial-scale=1.0" /> <title>Payment Status</title> <link rel="stylesheet" href="https://cdn.jsdelivr.net/npm/bootstrap@4.0.0/dist/css/bootstrap.min.css" integrity="sha384-Gn5384xqQ1aoWXA+058RXPxPg6fy4IWvTNh0E263XmFcJlSAwiGgFAW/dAiS6JXm" crossorigin="anonymous" /> </head> <body> <main class="checkout-page"> <div class="header" style="text-align:center"> <h5>Payment Status</h5> </div> <div class="text-wrap"> <div class="box-wrap"> <div class="row justify-content-center"> <div class="col"> <div class="summary-div checkout-page"> <?php if(isset($_GET['order_id']) && $_GET['order_id'] !=''){ $order_id=$_GET['order_id']; // write your fetch query to fetch order details by id and customise the layout and information if($order_id !=''){ ?> <p class="text-center text-success" style="font-size: 18px;"> Payment Successfull! </p> <div class="row item-row sub-total-row"> <div class="col-md-6 col-sm-6 col">Order Id </div> <div class="col-md-6 col-sm-6 col text-right"> <strong><?php echo $order_id;?></strong> </div> </div> <div class="orderDetails row item-row sub-total-row"> <div class="col-md-12 col-sm-12 col"> <p>Thank you for your payment. </p> </div> </div> </div> <?php }else{ ?> <p class="text-center text-red"> Payment is failed. <br> <i class="fa fa-times" aria-hidden="true"></i> </p> <?php } ?> </div> </div> </div> </div> </div> </div> </main> </body> </html> <?php }else{ echo "{'error':'Record not found'}"; } |
It’s done, Now you can make the payment in test mode.
Do you want to get implementation help, or modify or extend the functionality of this script? Submit a paid service request
Wrapping Words
By following these steps, you can Integrate Cashfree Payment Gateway into your PHP application. Ensure to test the integration thoroughly in the sandbox environment before going live. This integration will enable you to accept payments securely and efficiently, enhancing the overall user experience on your website.
Note: Please replace ‘YOUR_CLIENT_ID’, ‘YOUR_SECRET_KEY’, ‘RETURN_URL’,’NOTIFY_URL’, and other placeholders with your actual credentials and data.
Are you want to get implementation help, or modify or extend the functionality?
A Tutorialswebsite Expert can do it for you.
FAQs
Integrating Cashfree allows your business to accept payments securely and efficiently, providing a seamless payment experience for your customers. Cashfree is known for its quick settlements, robust security, and ease of integration.
1. Log in to your Cashfree Dashboard.
2. Go to Payment Gateway Dashboard > and click on Developers> API Keys.
3. Click API Keys under Payment Gateway.
In test environment API keys will be auto-generated. In prod-environment you need to click on Generate API Keys
Obtain the API keys (App ID and Secret Key)
Webhooks are HTTP callbacks that allow Cashfree to notify your server about payment events asynchronously. Set up a callback.php file to handle these notifications. This is useful for handling events like successful payments, payment failures, and refunds.
Yes, Cashfree is PCI-DSS compliant and uses advanced fraud detection mechanisms to ensure all transactions are secure. Ensure you follow best practices in storing and handling API credentials and payment data.
Yes, Cashfree provides a sandbox environment for testing purposes. Use TEST as the environment in your configuration to test the integration thoroughly before switching to the production environment.
Thanks for reading 🙏, I hope you found integrate the Cashfree payment gateway into your PHP tutorial helpful for your project. Keep learning! If you face any problems – I am here to solve your problems.

Pradeep Maurya is the Professional Web Developer & Designer and the Founder of “Tutorials website”. He lives in Delhi and loves to be a self-dependent person. As an owner, he is trying his best to improve this platform day by day. His passion, dedication and quick decision making ability to stand apart from others. He’s an avid blogger and writes on the publications like Dzone, e27.co


