PayKun Payment Gateway supports all the major available platforms with its ready Plugins and SDKs, which makes it very easy to integrate. It is the best payment gateway option in India and also it is the cheapest and very cost-effective.
This article will provide simple and effective guidance on how to integrate PayKun in PHP.
Steps to integrate PayKun Payment Gateway
Step 1: PayKun Payment Gateway Registration
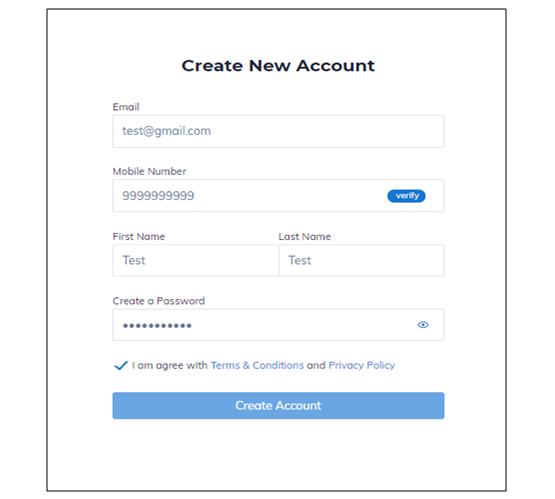
Register on PayKun from here and get access to the Sandbox Login which can be used for the testing purpose after the signing up of the PayKun Merchant Account. (Please note that for the Live Mode the account needs to be verified, approved and activated by PayKun)
Step 2: Access Sandbox Mode
After signing up, you may generate the test mode credentials and the API Encryption Key to access the testing Sandbox Mode.
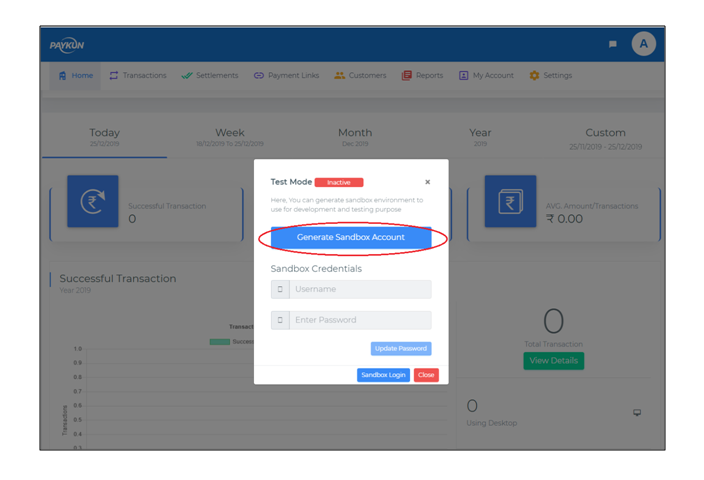
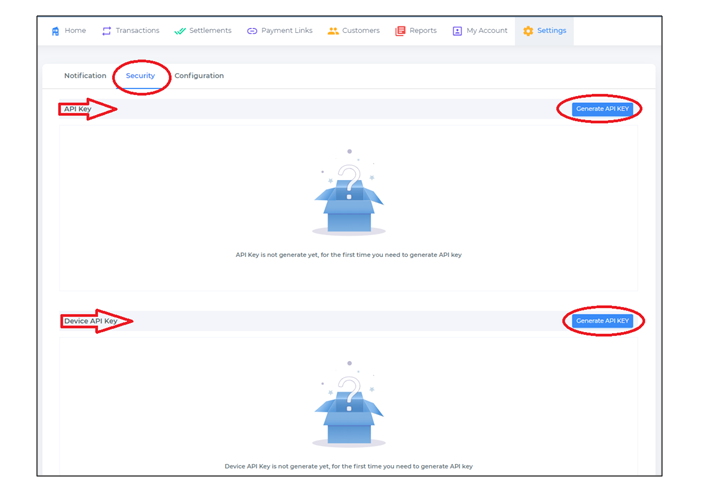
- You need to set: isLive=false in your integration kit.
- If you have generated API Key before then you will see the date of the API Key generated, since you will not be able to retrieve the old API Key (For security reasons) we have provided the re-generate option, so you can re-generate API Key in case you have lost the old one.
- Note: Once you re-generate API Key your old API Key will stop working immediately. So be cautious while using this option.
Step 3: You can download the Paykun zip file from here
Step 4: Open the demo/request.php file and create the same type of custom form like the one given there.
Step 5: Fill your custom form by entering your credentials like merchant_id, Access_token, Encryption_key and required configuration and then redirect it on submit.php file.
|
2 3 4 5 6 7 8 9 10 11 12 13 14 15 16 17 18 19 20 21 22 23 24 25 26 27 28 29 30 31 32 33 34 35 36 37 38 39 40 |
require 'src/Payment.php'; require 'src/Validator.php'; require 'src/Crypto.php'; /** * Parameters requires to initialize an object of Payment are as follow. * mid => Merchant Id provided by Paykun * accessToken => Access Token provided by Paykun * encKey => Encryption provided by Paykun * isLive => Set true for production environment and false for sandbox or testing mode * isCustomTemplate => Set true for non composer projects, will disable twig template */ $obj = new \Paykun\Checkout\Payment('<merchantId>', '<accessToken>', '<encryptionKey>', true, true); // Initializing Order $obj->initOrder('<orderId>', '<Purpose or ProductName>', "<amount>", '<successUrl.example.com>', '<failUrl.example.com>'); // Add Customer $obj->addCustomer('<customerName>', '<customerEmail>', '<customerContactNo>'); // Add Shipping address $obj->addShippingAddress('<country>', '<state>', '<city>', '<postalCode>', '<fullAddress>'); // Add Billing Address $obj->addBillingAddress('<country>', '<state>', '<city>', '<postalCode>', '<fullAddress>'); //Render template and submit the form echo $obj->submit(); /* Check for transaction status * Once your success or failed url called then create an instance of Payment same as above and then call getTransactionInfo like below * $obj = new Payment('merchantUId', 'accessToken', 'encryptionKey', true, true); //Second last false if sandbox mode * $transactionData = $obj->getTransactionInfo(Get payment-id from the success or failed url); * Process $transactionData as per your requirement * * */ |
Also Read: Authorize.Net Payment Gateway Integration using PHP
Also Read: Integrate Recurring Stripe Subscription Payment with PHP

Pradeep Maurya is the Professional Web Developer & Designer and the Founder of “Tutorials website”. He lives in Delhi and loves to be a self-dependent person. As an owner, he is trying his best to improve this platform day by day. His passion, dedication and quick decision making ability to stand apart from others. He’s an avid blogger and writes on the publications like Dzone, e27.co


