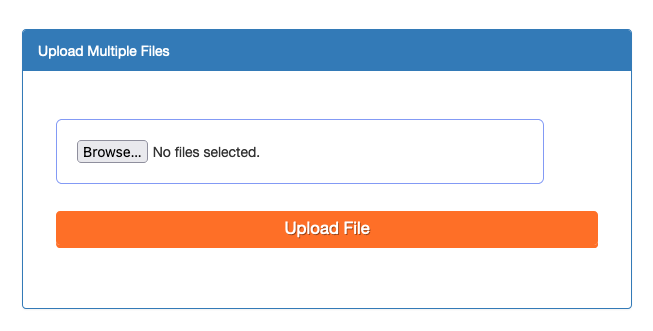
Uploading multiple files is a common feature in web applications, especially for handling images or documents. Ensuring that users upload only valid file types is crucial for both security and a smooth user experience. In this tutorial, you’ll learn how to create a multiple file upload form using JavaScript and PHP, complete with client-side file type validation.
By allowing users to upload multiple files without validation, you risk exposing your application to security issues. We’ll build a robust system that lets users select multiple files, checks their types on the client side, and then uploads them to the server using PHP.
Upload Multiple Files with JavaScript and PHP: Real-Time Validation
Are you want to get implementation help, or modify or extend the functionality?
A Tutorialswebsite Expert can do it for you.
Step-1: Setting Up the Environment
Before we dive into the code, ensure you have the following:
- A web server with PHP support (e.g., Apache, Nginx).
- A text editor or IDE (e.g., Visual Studio Code, Sublime Text).
- Basic knowledge of HTML, JavaScript, and PHP.
Suggested Read: How to upload video with a progress bar in PHP
Step-2: Building the HTML Form
First, we’ll create a simple HTML form that allows users to select multiple files. The form will include an onchange event to trigger file type validation as soon as files are selected.
Create a file named “index.php” and copy & paste the below code:
|
2 3 4 5 6 7 8 9 10 11 12 13 14 15 16 17 18 19 20 21 |
<!DOCTYPE html> <html lang="en"> <head> <meta charset="UTF-8"> <meta name="viewport" content="width=device-width, initial-scale=1.0"> <title>Upload Multiple Files</title> </head> <body> <h4>Upload Multiple Files</h4> <form id="uploadForm" enctype="multipart/form-data"> <input type="file" id="fileInput" name="files[]" multiple onchange="return fileValidation()"> <button type="button" onclick="uploadFiles()">Upload</button> </form> <div id="status"></div> <script src="upload.js"></script> </body> </html> |
In this form:
- The
inputelement withtype="file"allows users to select files. - The
multipleattribute allows selecting multiple files at once. - A
buttontriggers the JavaScript function to upload the files.

Step-3: Implementing JavaScript for File Validation and Upload
Next, we’ll write the JavaScript code that handles file validation and the actual upload process. This code validates file types as soon as users select them and prevents invalid files from uploading.
Create a file named “upload.js” and copy & paste the below code:
|
2 3 4 5 6 7 8 9 10 11 12 13 14 15 16 17 18 19 20 21 22 23 24 25 26 27 28 29 30 31 32 33 34 35 36 37 38 39 40 41 42 43 44 45 46 47 48 49 50 51 52 53 54 55 56 57 58 59 60 61 62 63 64 65 66 67 68 69 70 71 |
// JavaScript for file validation and upload function fileValidation() { const files = document.getElementById('fileInput').files; const allowedTypes = ['image/jpeg', 'image/png', 'image/gif']; // Allowed file types let errorMessages = []; for (let i = 0; i < files.length; i++) { if (!allowedTypes.includes(files[i].type)) { errorMessages.push(`File "${files[i].name}" is not a valid file type.`); } } if (errorMessages.length > 0) { document.getElementById('status').innerHTML = errorMessages.join('<br>'); document.getElementById('status').classList.remove("success"); document.getElementById('status').classList.add("failed"); return false; // Prevent further processing if there are invalid files } document.getElementById('status').innerHTML = ''; // Clear any previous errors document.getElementById('status').classList.remove("failed"); return true; // Allow upload if all files are valid } function uploadFiles() { const formData = new FormData(); const files = document.getElementById('fileInput').files; if (files.length === 0) { document.getElementById('status').innerText = 'Please select at least one file to upload.'; document.getElementById('status').classList.remove("success"); document.getElementById('status').classList.add("failed"); return; // Stop upload if no files are selected } if (!fileValidation()) { return; // Stop upload if validation fails } document.getElementById('status').innerText = 'Please Wait, Uploading...'; for (let i = 0; i < files.length; i++) { formData.append('files[]', files[i]); } const xhr = new XMLHttpRequest(); xhr.open('POST', 'upload.php', true); xhr.onload = function() { if (xhr.status === 200) { document.getElementById('status').innerText = 'Files uploaded successfully!'; document.getElementById('fileInput').value = ''; document.getElementById('status').classList.remove("failed"); document.getElementById('status').classList.add("success"); } else { document.getElementById('status').innerText = 'Failed to upload files.'; document.getElementById('status').classList.remove("success"); document.getElementById('status').classList.add("failed"); } }; xhr.send(formData); } |
Here’s what’s happening:
- Onchange Event: The
fileValidation()function is triggered every time a user selects files. This is set up in the HTML usingonchange="return fileValidation()". - File Type Validation: The code iterates over each selected file and checks its type against the allowed types.
- Displaying Error Messages: If invalid files are detected, the error messages are displayed inside the
statusdiv, and the function returns early, preventing the upload. - Allowed File Types: The array
allowedTypescontains the MIME types of the files that are allowed to be uploaded. This example permits only JPEG, PNG, and GIF images. - We create a
FormDataobject to hold the files. - The files are retrieved from the input element and appended to the
FormDataobject. - An
XMLHttpRequestis used to send theFormDatato a PHP script (upload.php) on the server. - Upon completion, the system displays a message to the user indicating whether the upload succeeded or failed.
Step-4: PHP Script to Handle File Upload
Finally, let’s create the PHP script that will handle the uploaded files. This script will validate the file types on the server side and save the files to a designated directory.
Also Read: Drag and Drop File Upload using DropzoneJS, PHP & MySQL
Create a file named upload.php:
|
2 3 4 5 6 7 8 9 10 11 12 13 14 15 16 17 18 19 20 21 22 23 24 25 26 27 28 29 30 31 32 33 34 35 |
<?php $uploadDir = 'uploads/'; $allowedTypes = ['image/jpeg', 'image/png', 'image/gif']; // Allowed file types if (!file_exists($uploadDir)) { mkdir($uploadDir, 0777, true); } if ($_SERVER['REQUEST_METHOD'] === 'POST' && isset($_FILES['files'])) { $files = $_FILES['files']; for ($i = 0; $i < count($files['name']); $i++) { $fileName = basename($files['name'][$i]); $fileType = $files['type'][$i]; $targetFilePath = $uploadDir . $fileName; // Validate file type if (in_array($fileType, $allowedTypes)) { // Move file to the destination directory if it's valid if (move_uploaded_file($files['tmp_name'][$i], $targetFilePath)) { echo "File {$fileName} uploaded successfully.<br>"; } else { echo "Error uploading file {$fileName}.<br>"; } } else { echo "File {$fileName} is not a valid file type.<br>"; } } } else { echo "No files were uploaded."; } ?> |
This PHP script:
- Checks if the upload directory exists, and if not, it creates one.
- Loops through each uploaded file, moving it from the temporary location to the upload directory.
- Provides feedback for each file upload, indicating success or failure.
Are you want to get implementation help, or modify or extend the functionality?
A Tutorialswebsite Expert can do it for you.
It’s done. Now just open your index.php file in your browser and upload the multiple files.
Conclusion
Uploading multiple files using JavaScript and PHP is a straightforward process. The combination of JavaScript’s ability to handle files on the client side and PHP’s server-side processing power makes it easy to create a user-friendly file upload experience. This tutorial should provide you with a solid foundation to implement multiple file uploads in your own web applications.
Thanks for reading 🙏, I hope you found Upload multiple files using JavaScript and PHP tutorial helpful for your project. Keep learning! If you face any problems – I am here to solve your problems.

Pradeep Maurya is the Professional Web Developer & Designer and the Founder of “Tutorials website”. He lives in Delhi and loves to be a self-dependent person. As an owner, he is trying his best to improve this platform day by day. His passion, dedication and quick decision making ability to stand apart from others. He’s an avid blogger and writes on the publications like Dzone, e27.co


